Welcome to the DeliveryBizconnect app Manual. In this lesson, we’re going to teach you how to create your Directory Listing in DeliveryBizConnect.
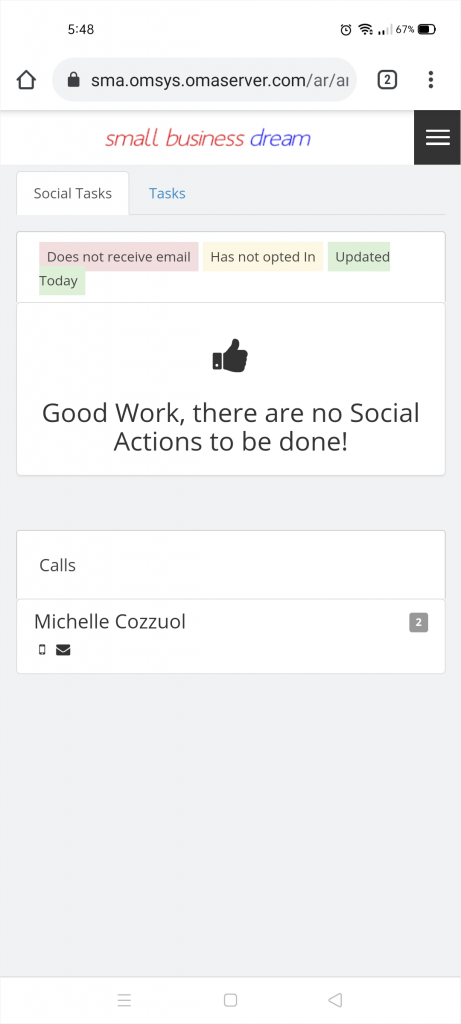
Step 1: Log in to smallbizdream.com, our flagship CRM that powers DeliveryBizConnect. Enter the username and password provided to you. Click ‘I’m not a robot’, and Login.
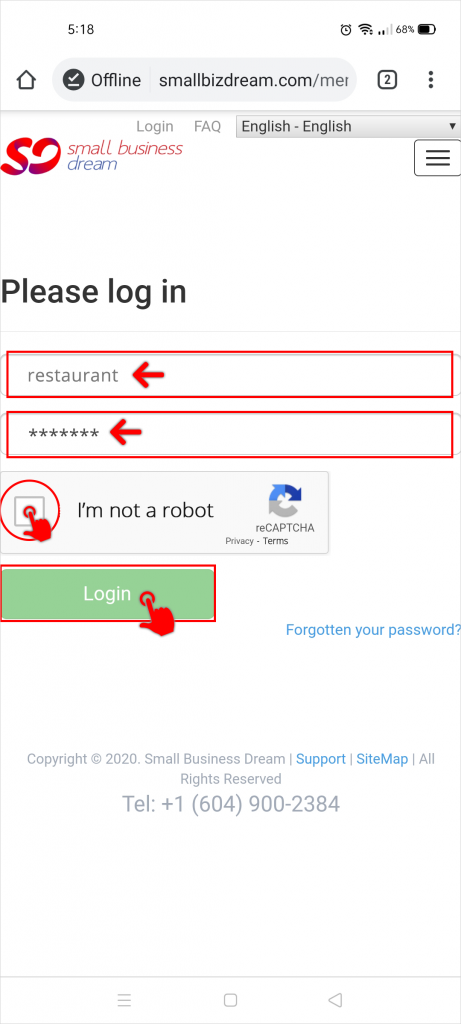
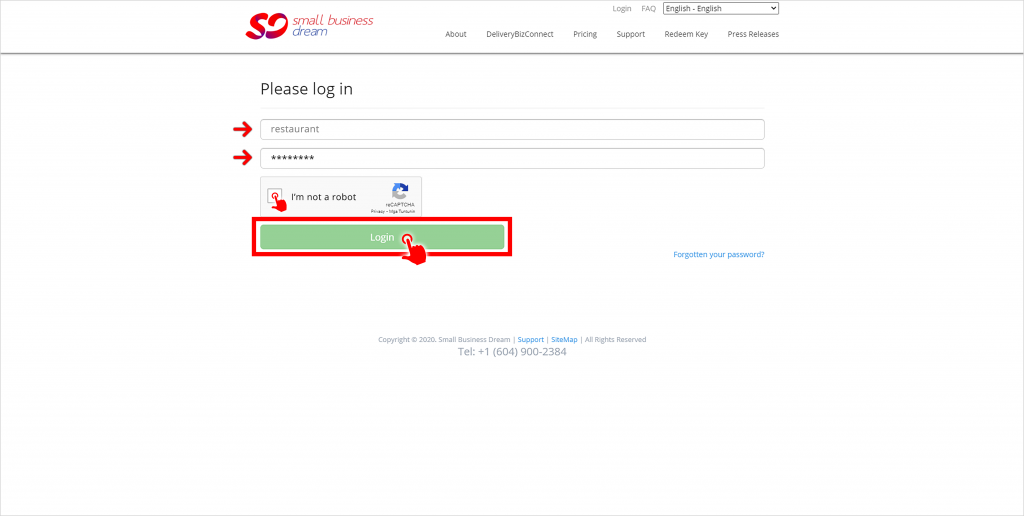
You’re now logged in to your SmallBizDream back office.
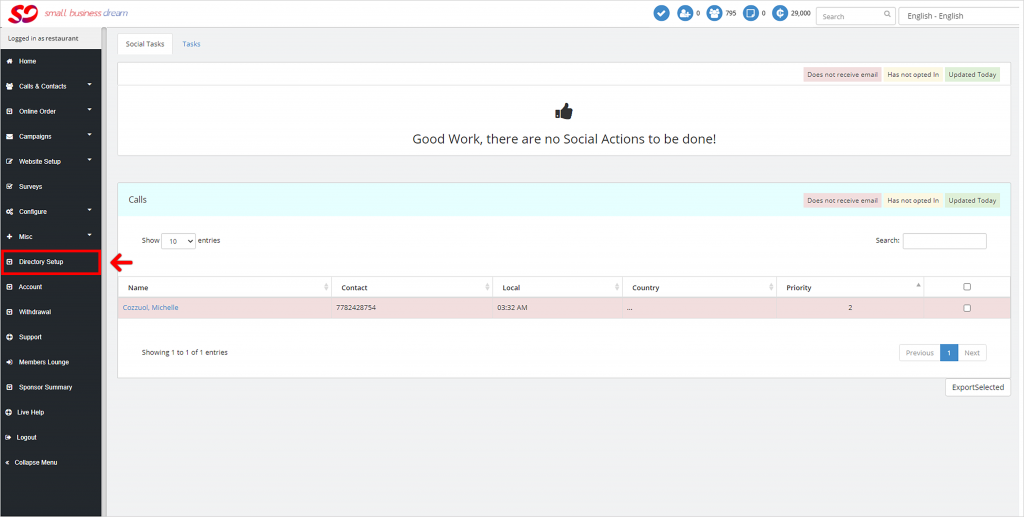
Step 2: Click Directory Setup and enter all the information required to create your Directory Listing.
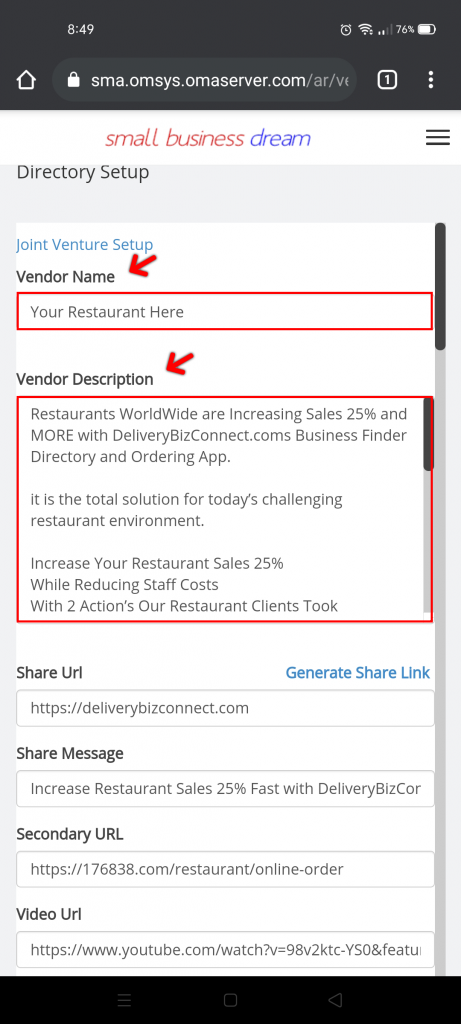
Step 3: Type in your restaurant’s name and a short description of your restaurant or pub:
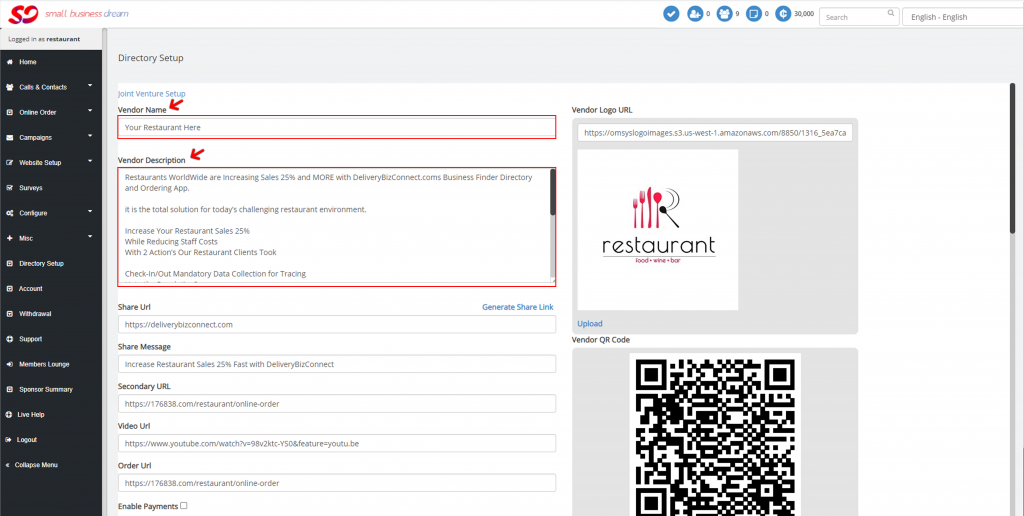
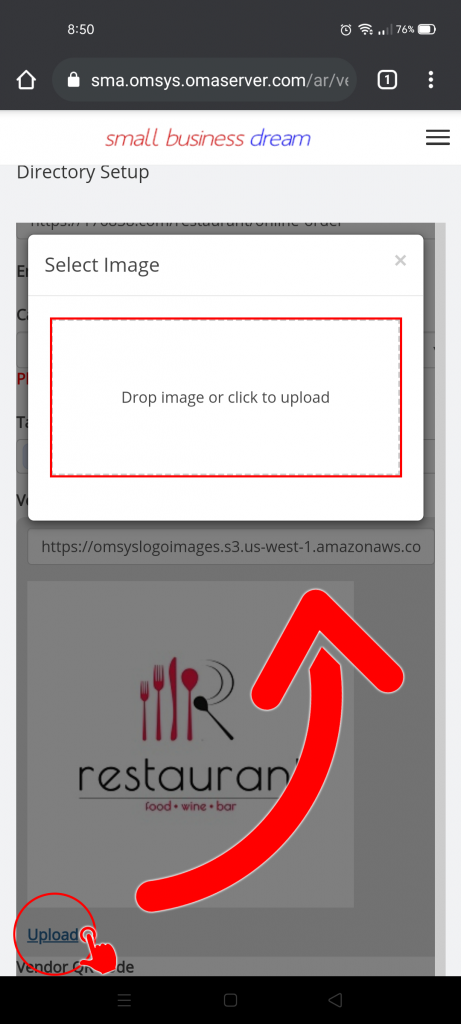
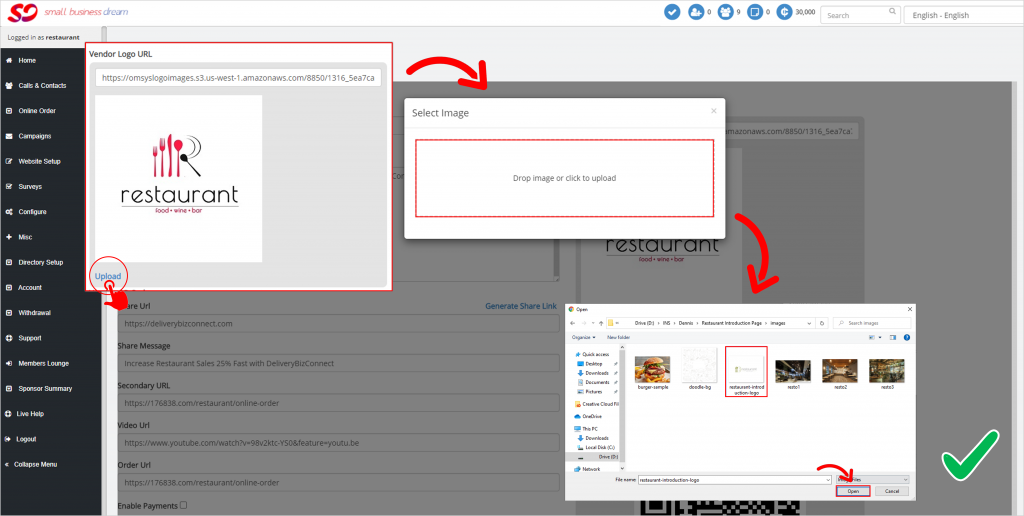
Step 4: Upload your restaurant’s logo. Click upload and select your image. Use a square image for your logo.
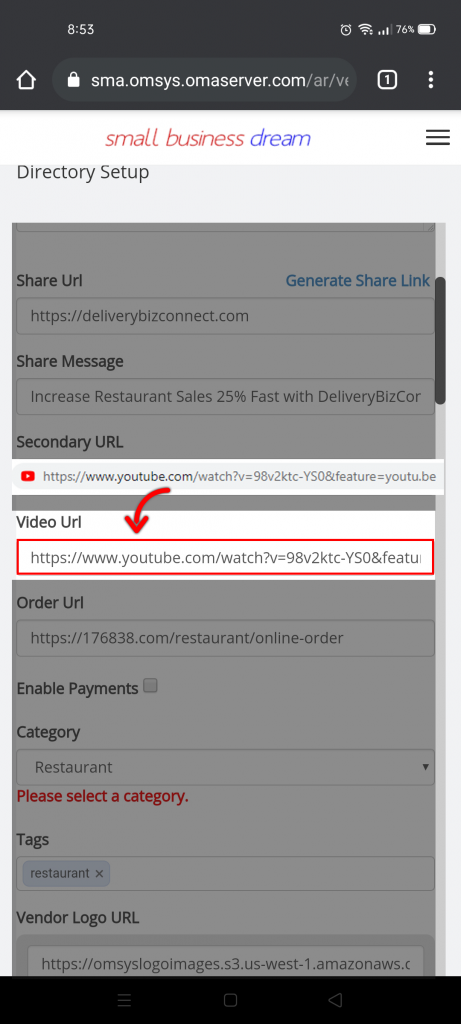
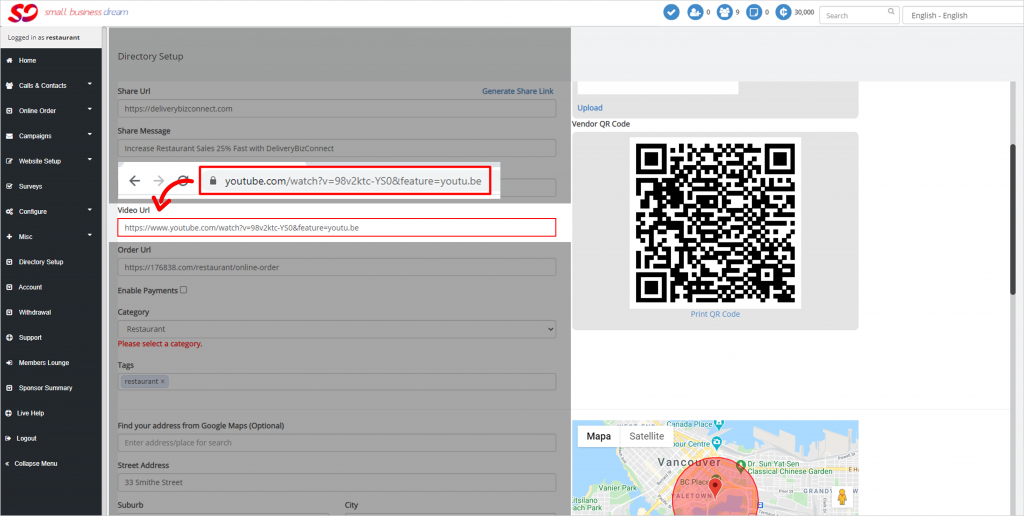
You can also upload a short introductory video of your restaurant from YouTube. Copy the ‘watch’ URL at the top and paste it in Video URL.
Step 5: Select your category as Restaurant.
Step 6: Look up your restaurant’s address on Google. Copy and paste it in the Google Maps area. It will search for matches based upon Google Maps. Try removing some text if it can’t find a match and choose the most appropriate one.
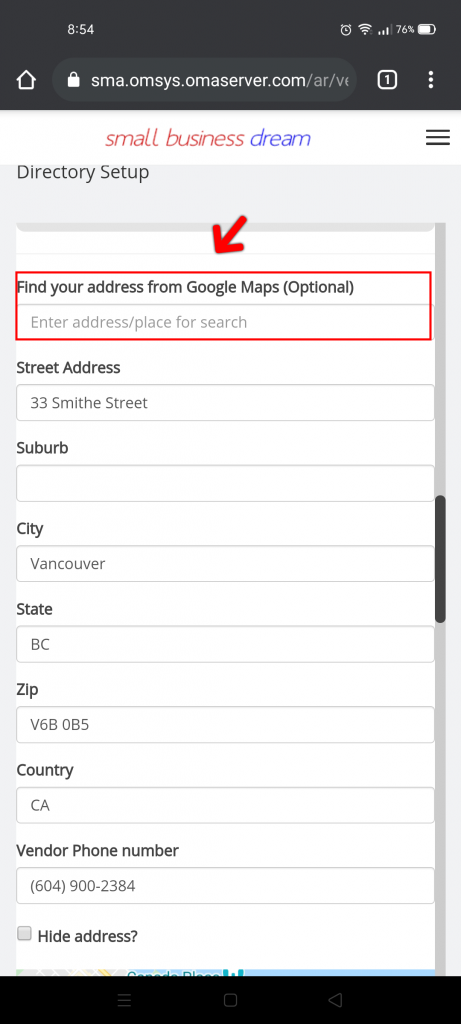
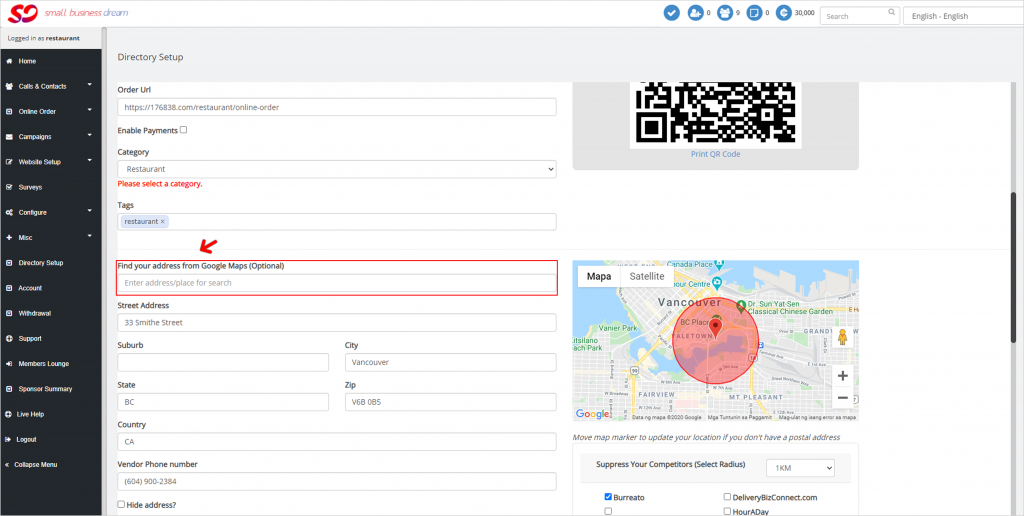
Now you got the correct address based on Google Maps.
Step 7: Type in your phone number.
Step 8: Select radius to suppress your competitors from being seen by your customers in the app. Notice the red circle on the map. That’s the radius from your destination.
2-kilometer radius:
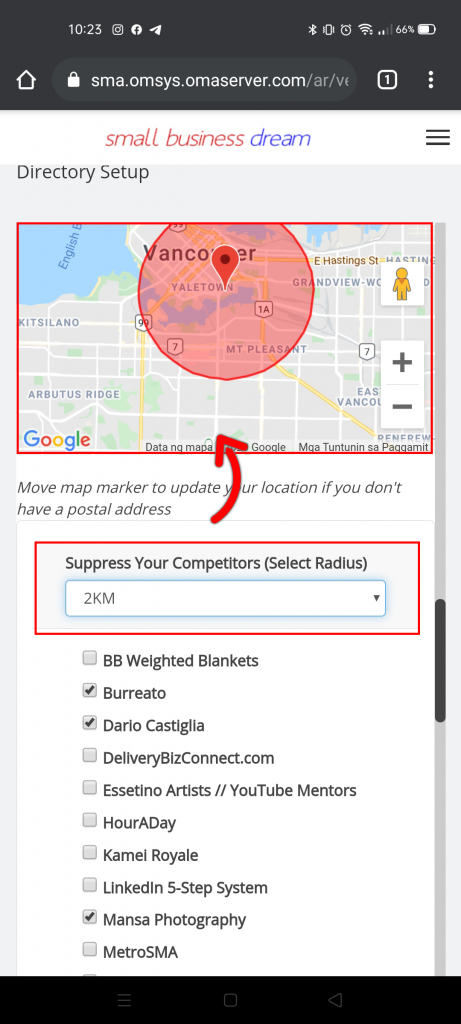
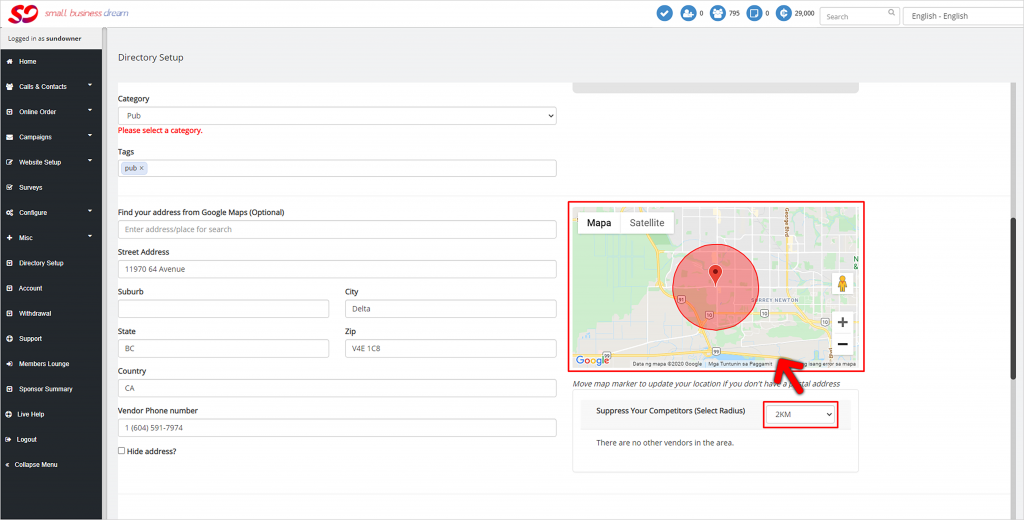
5-kilometer radius:
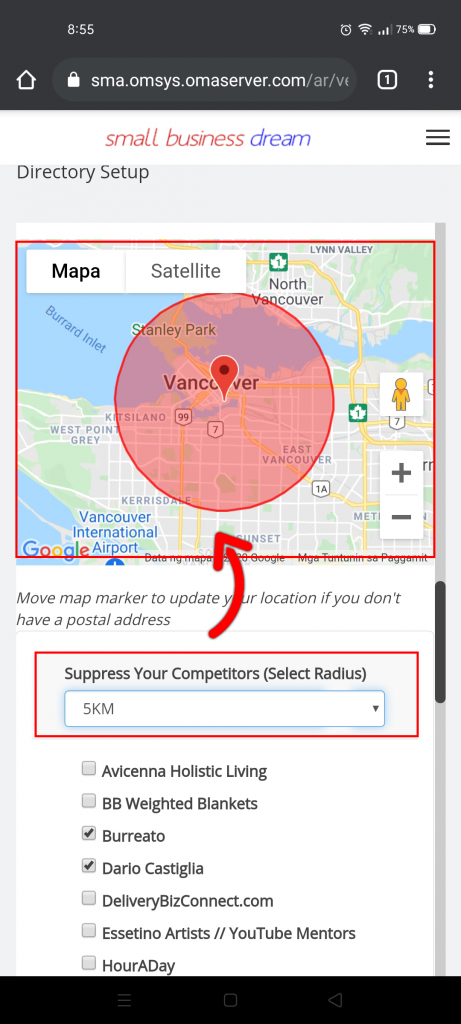
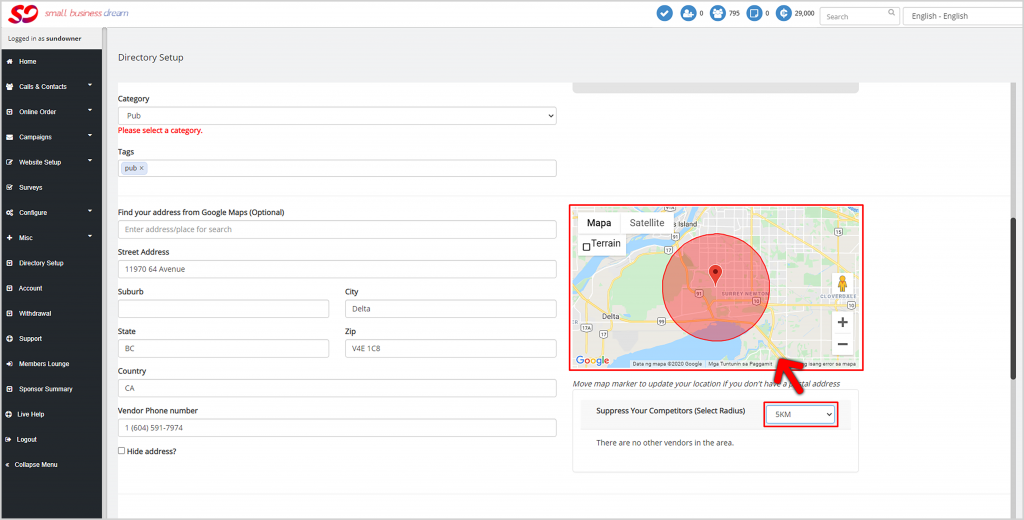
10-kilometer radius:
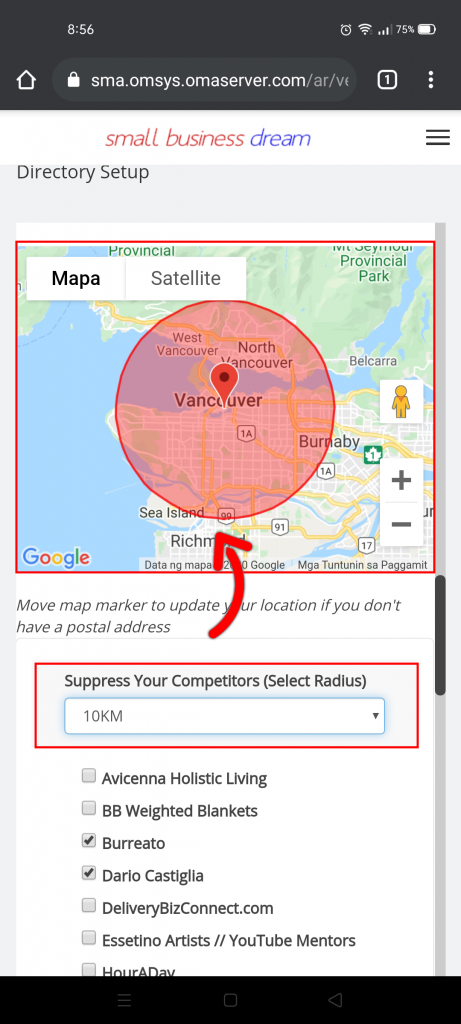
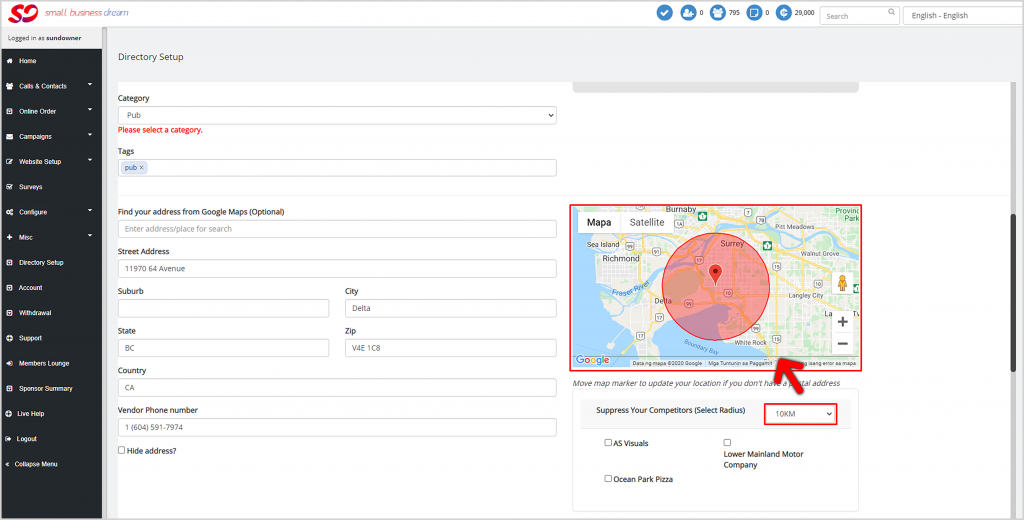
5 kilometers is usually a pretty good radius.
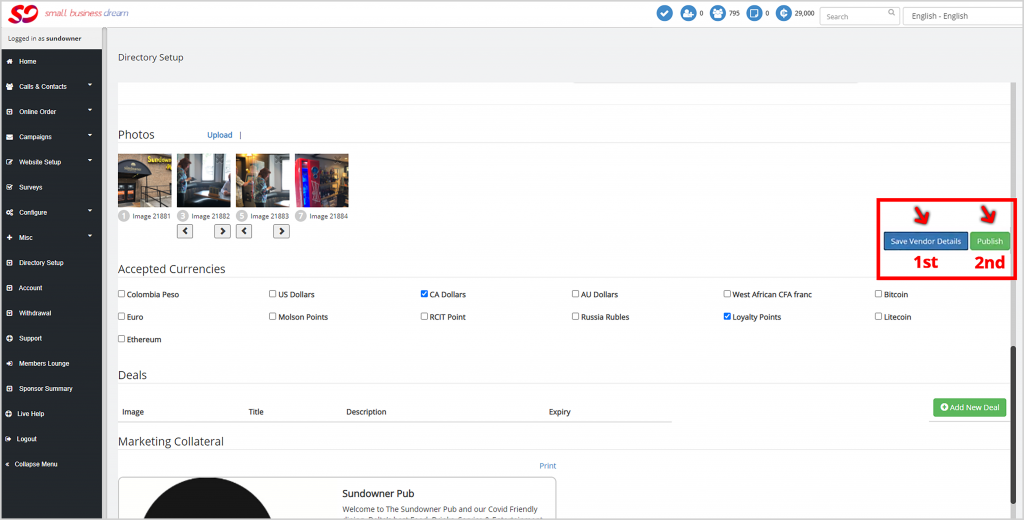
Step 9: Upload photos of your restaurant. Click upload and choose any photo that you want to upload. You can drag-and-drop or simply click on the image.
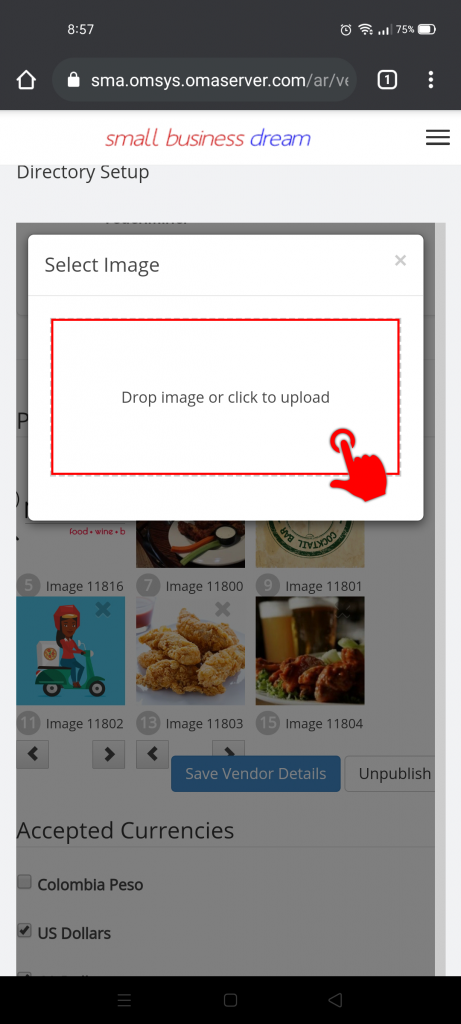
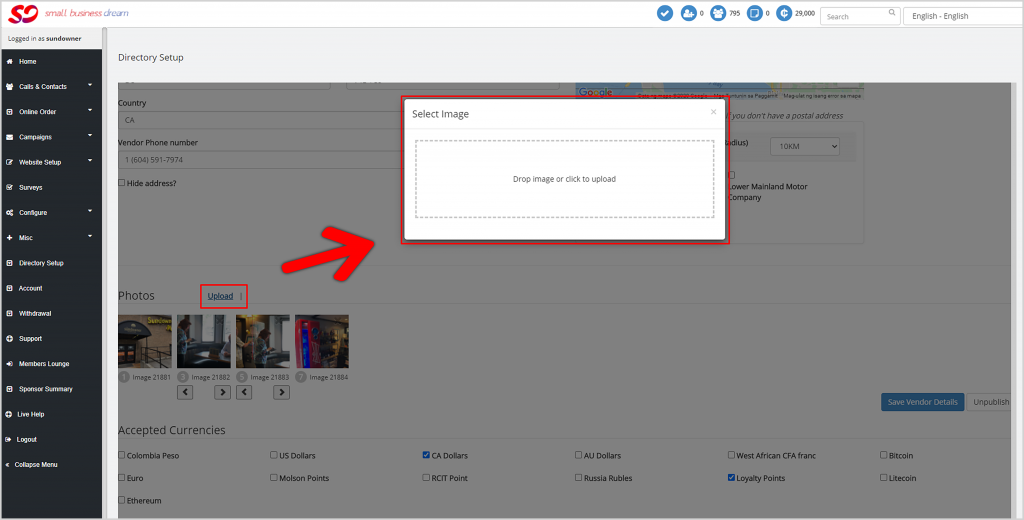
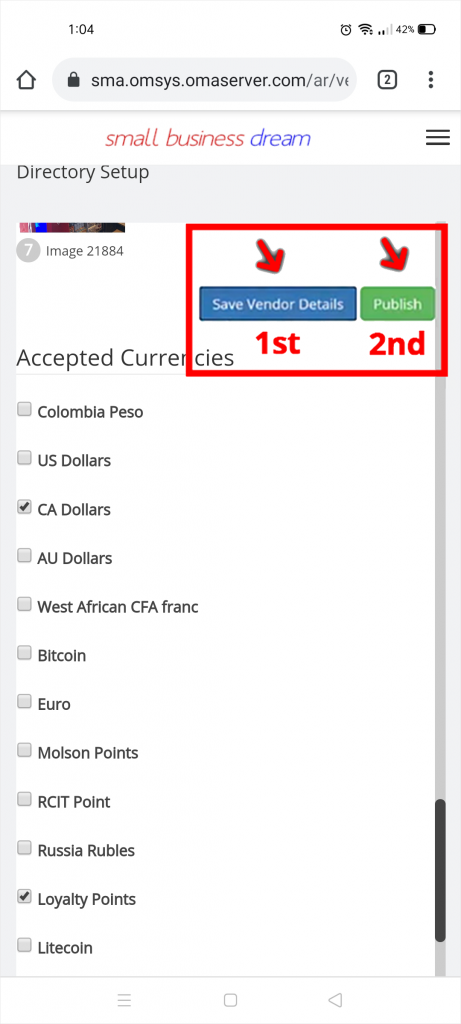
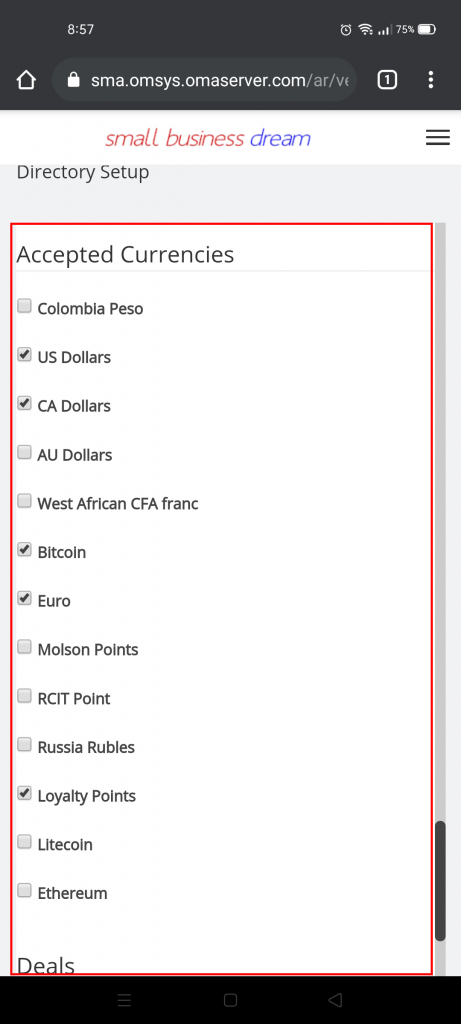
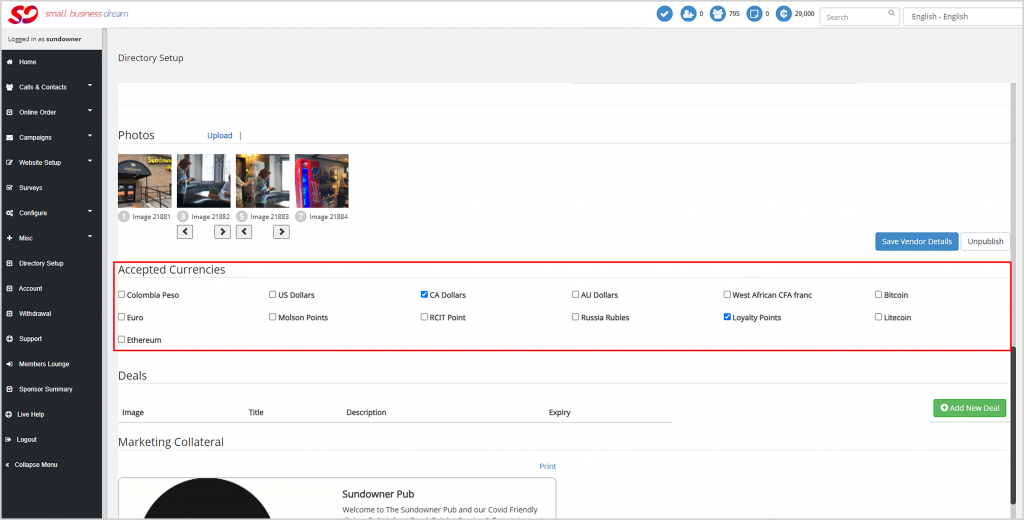
Step 10: Choose the accepted currencies you take. If you have a loyalty program, you may accept Loyalty Credits.
Step 11: Save your Vendor Details. Once it’s been done, you need to publish your listing. It will be looked at by Small Business Dream’s Customer Service Department and accepted within 24 hours and it will be live in the DeliveryBizConnect app.
