Welcome to the DeliveryBizconnect app Manual. In this lesson, we’re going to teach you how to set-up your Square Account in DeliveryBizConnect and start accepting payments online.
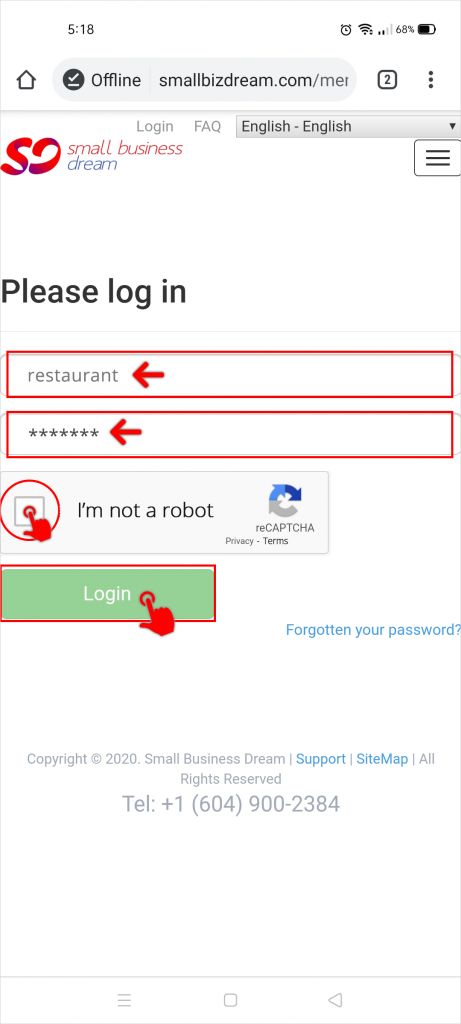
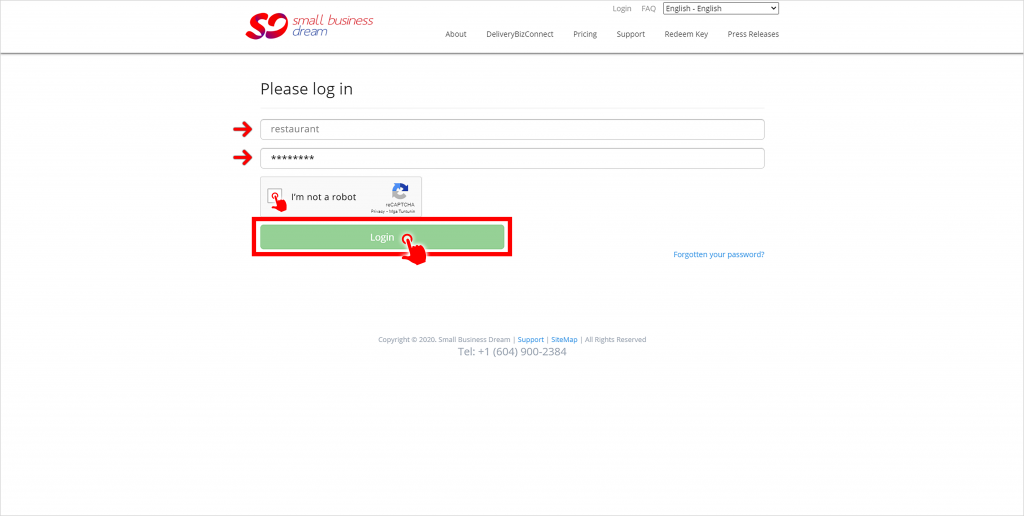
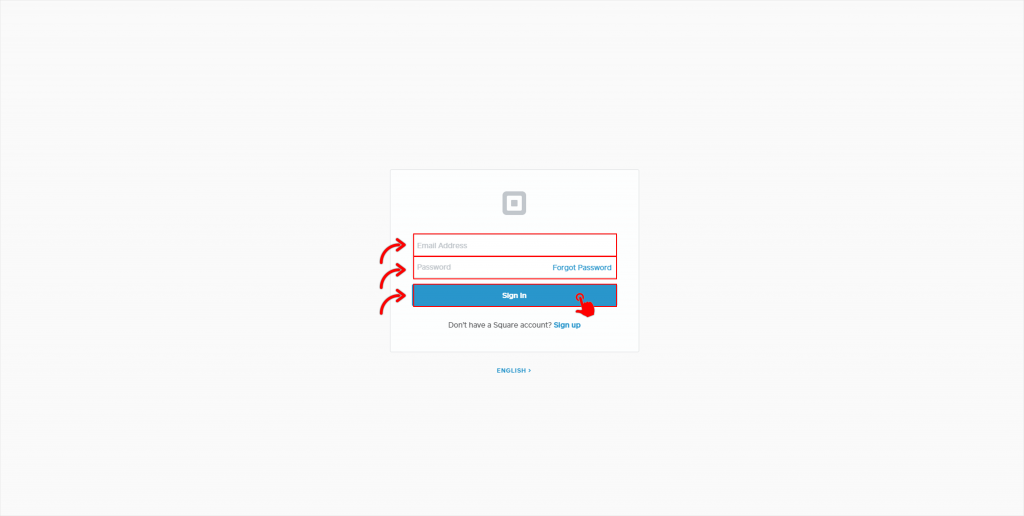
Step 1: Log in to smallbizdream.com. Enter the username and password provided to you. Click ‘I’m not a robot’, and Login.
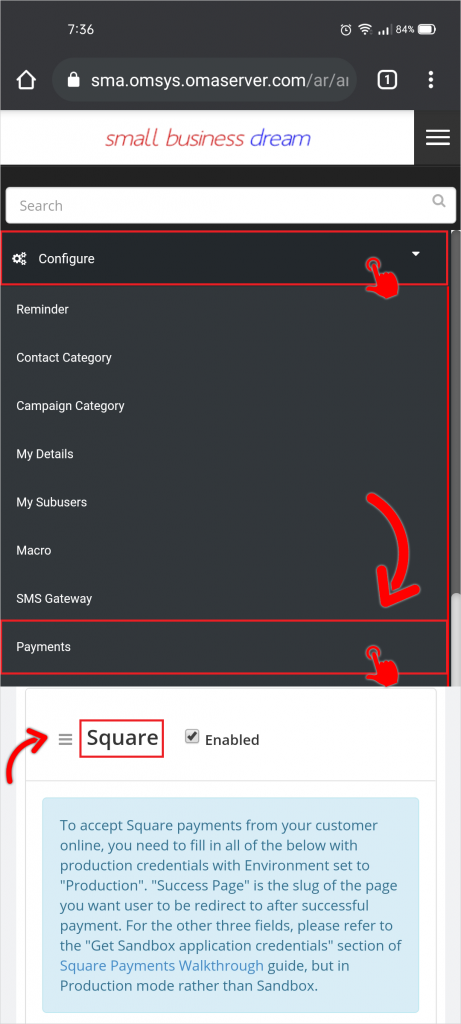
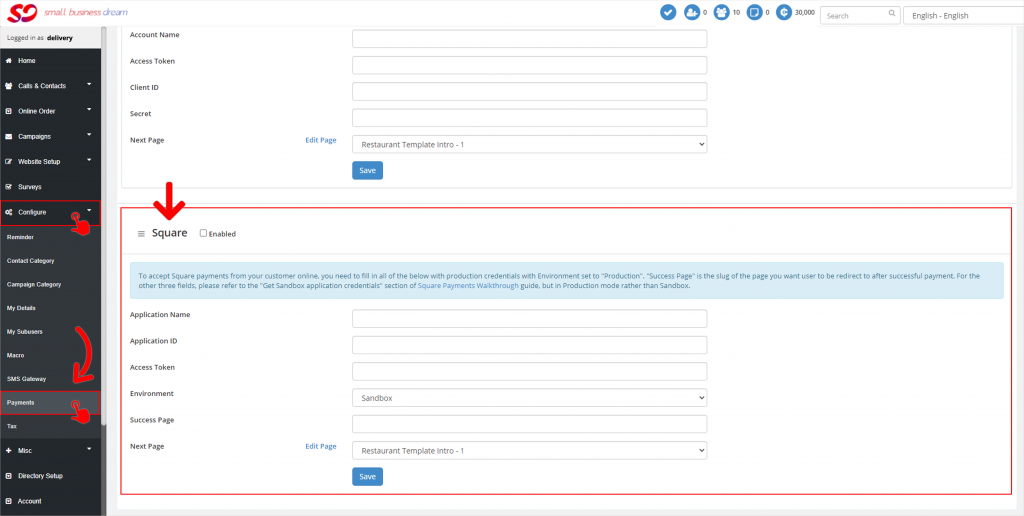
Step 2: Click Configure on the left menu and choose Payments. Small Business Dream currently uses 3 payment gateways. Scroll down to where it says “Square”.
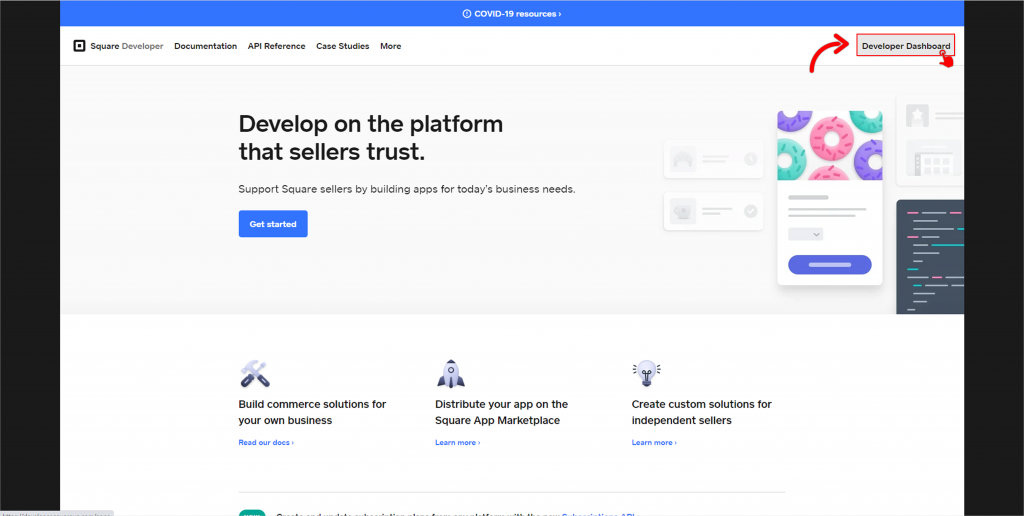
Step 3: Open a new tab or window and log in to Square’s Developer Dashboard.
![]()
![]()
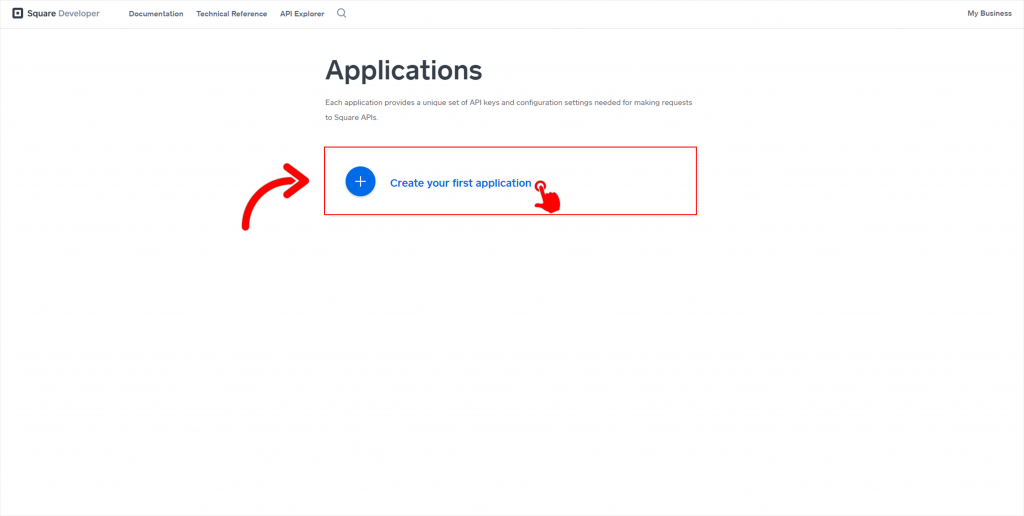
Step 4: Click Add an Application. For this step, you may refer to Square’s official guide: https://developer.squareup.com/docs/payment-form/payment-form-walkthrough
![]()
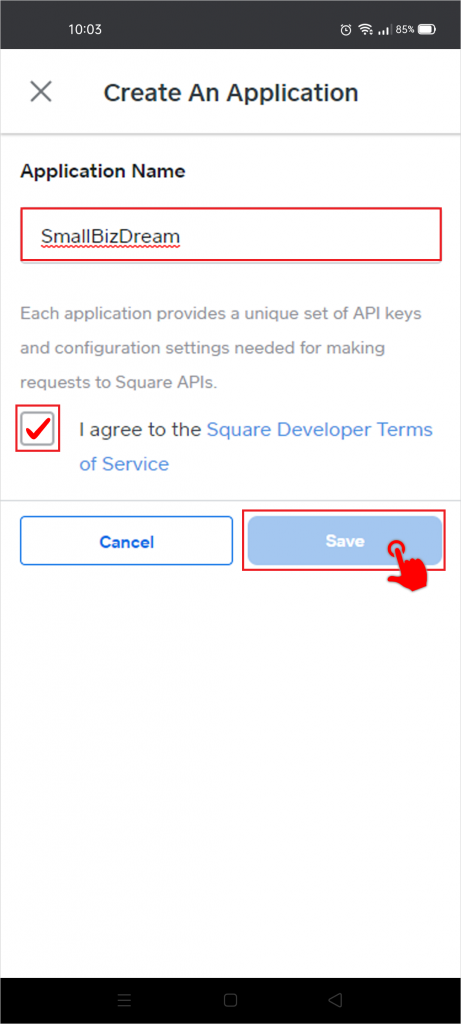
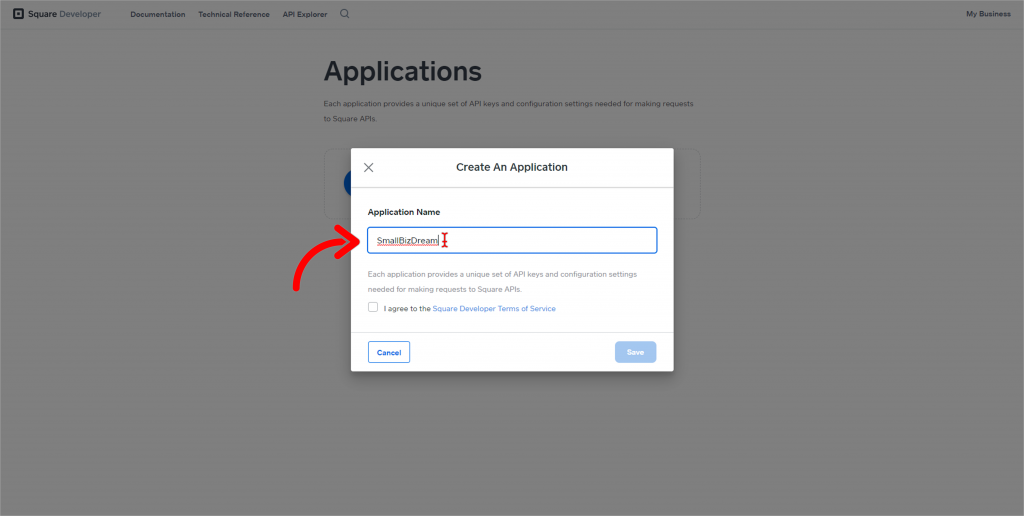
Step 5: Type in the Application Name. It can be as simple as “SmallBizDream”.
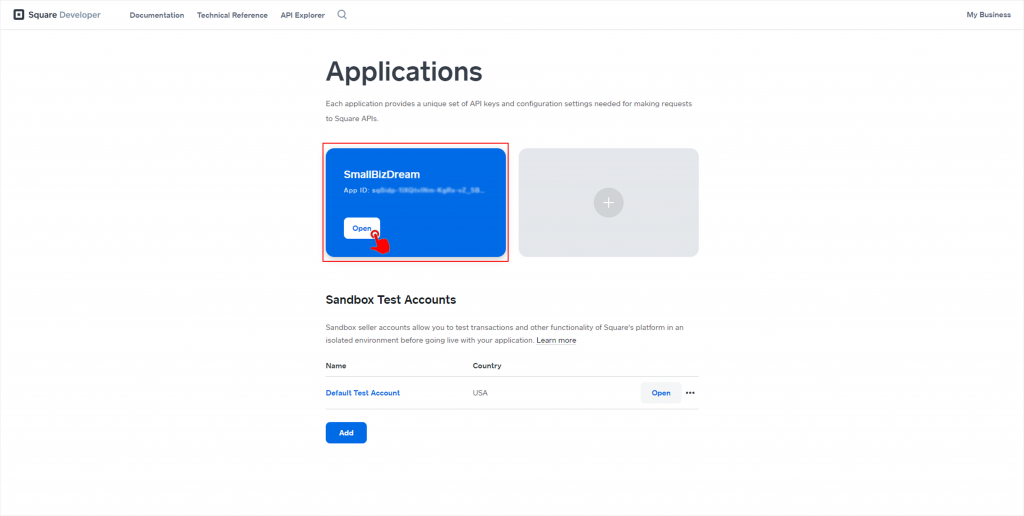
Step 6: Click on the Application you’ve just created.
![]()
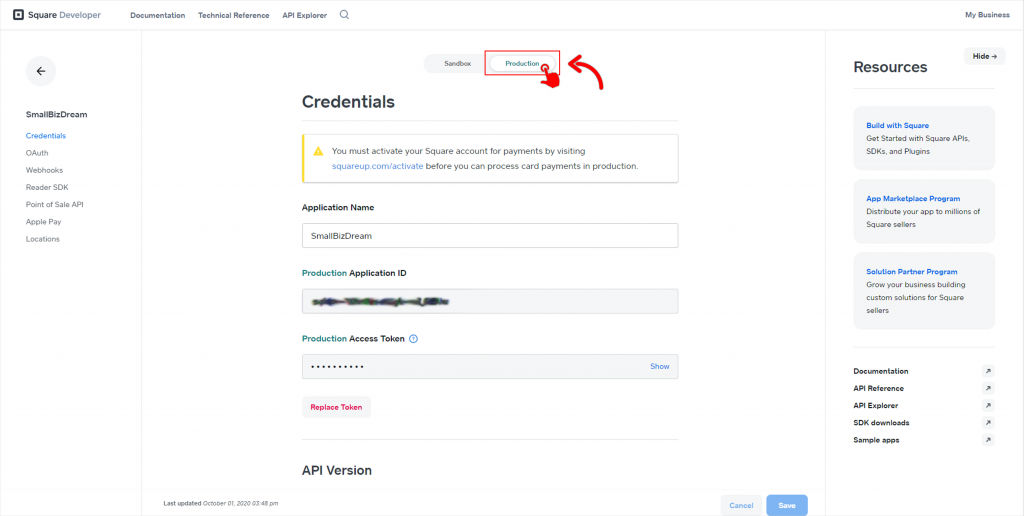
Step 7: To start taking payments on a Live system, click on the Production tab
![]()
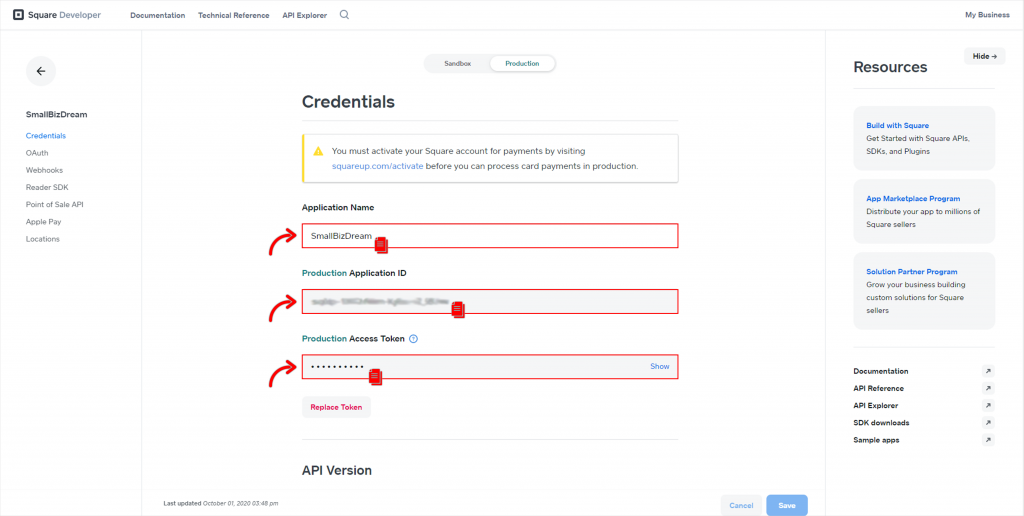
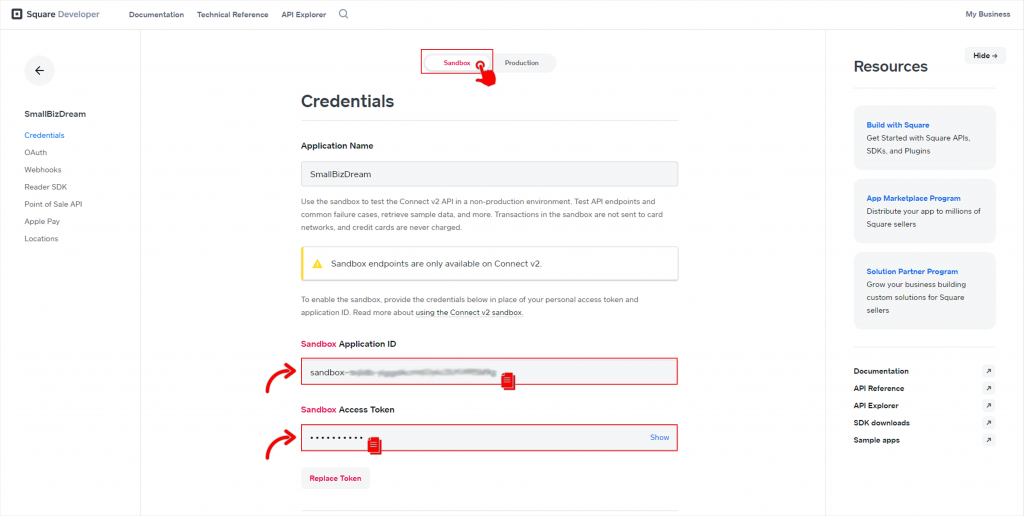
Step 8: Copy the following details about the Application you’ve created:
- Application Name
- Application ID
- Access Token
![]()
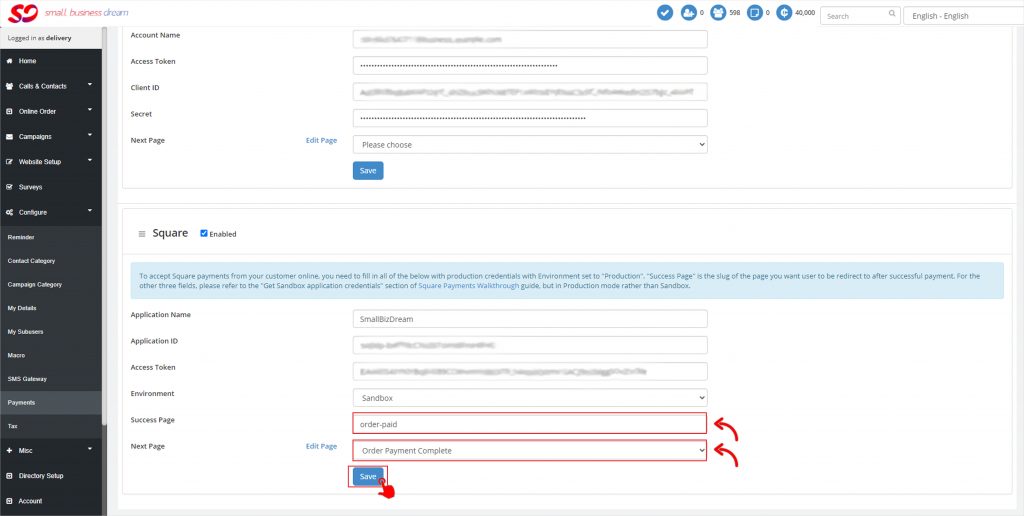
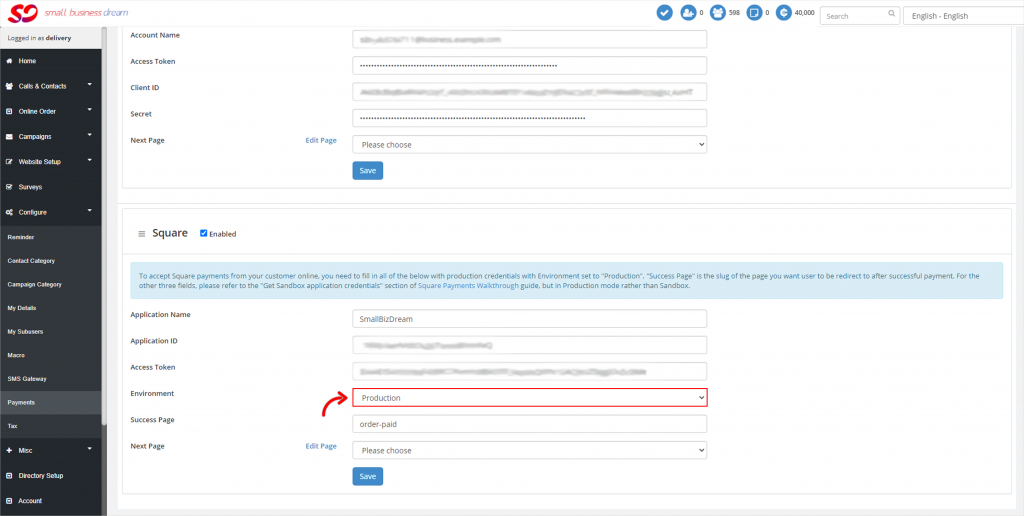
Step 9: Switch back to your SmallBizDream payment configuration page and paste the Application details (Application Name, Application ID, Access Token)
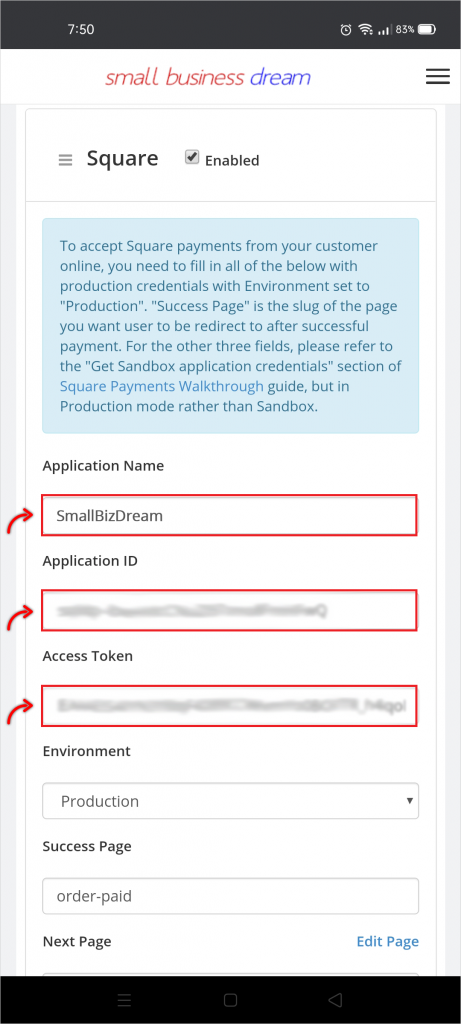
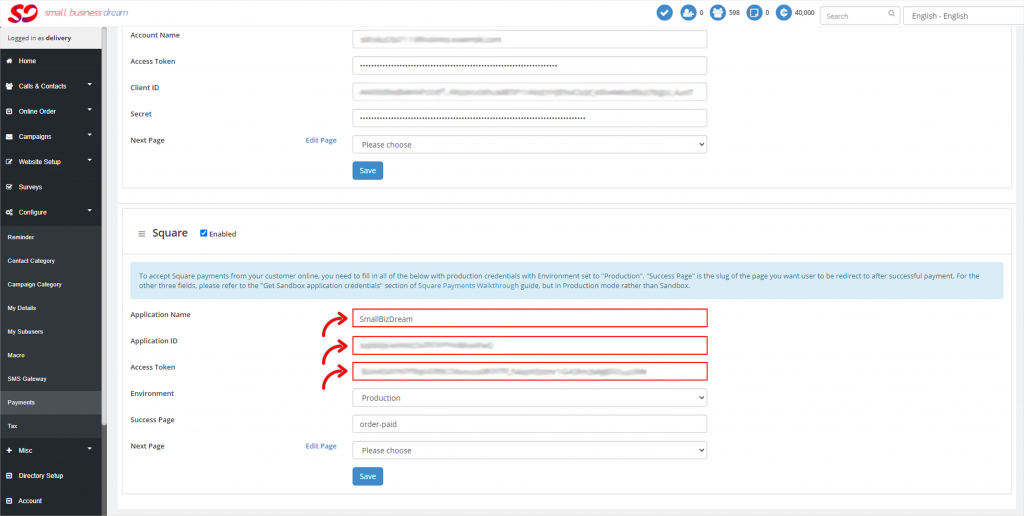
Step 10: Set Environment to “Production”.
![]()
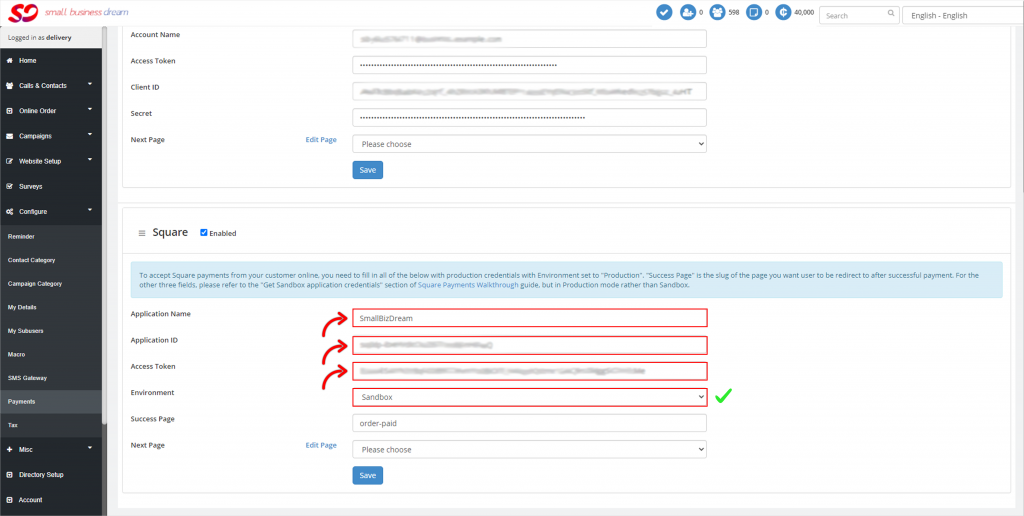
You can also set Environment to “Sandbox” for a test run. Go to the Application you’ve created in Square, change “Production” to “Sandbox”, and copy the details to your SmallBizDream payment configuration page.
![]()
![]()
Card number “4111 1111 1111 1111” will result in a successful transaction on sandbox. For a list of test values for sandbox go to: https://developer.squareup.com/docs/testing/test-values.
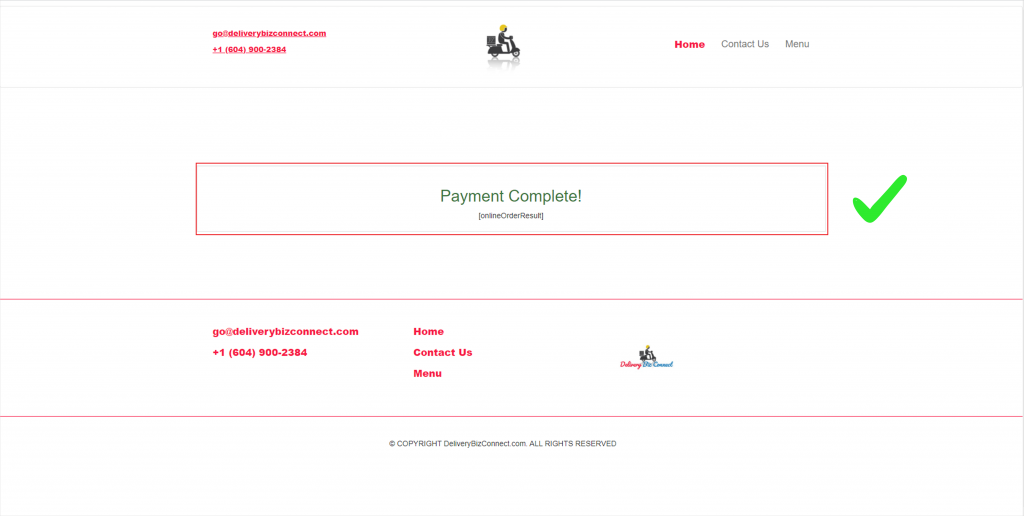
Step 11: Select your Success Page and Hit Save. This is the page your customer will end up after a successful payment using Square.
![]()
![]()